File uploads to MiniDLNA
Uploading files to your server can be tricky. This is usually due to privilege complications that are a pain (but necessary) in Linux). By default, when you install MiniDLNA the directories for your music/video/image files are owned by a MiniDLNA user, not your username.
I have found the simplest way to operate is to accept the default location for the root of the server files ( /var/lib/minidlna ).
Then to allow you (your username) access to this directory(s) by entering the two following lines:
BPiM5:yourname:# chmod -R 755 /var/lib/minidlna
chown is the Linux command to manage file/directory ownership.
chmod is the Linux command to manage file/directory access permissions.
I have found the simplest way to operate is to accept the default location for the root of the server files ( /var/lib/minidlna ).
There are two methods of uploading your files to miniDLNA.
FTP
Samba share
1) FTP
Using my favourite FTP client software, FileZilla (available for Linux, Mac &Windows), I upload my music etc. files to the server. Here are the basic settings for FileZilla. In 'Site Manager':
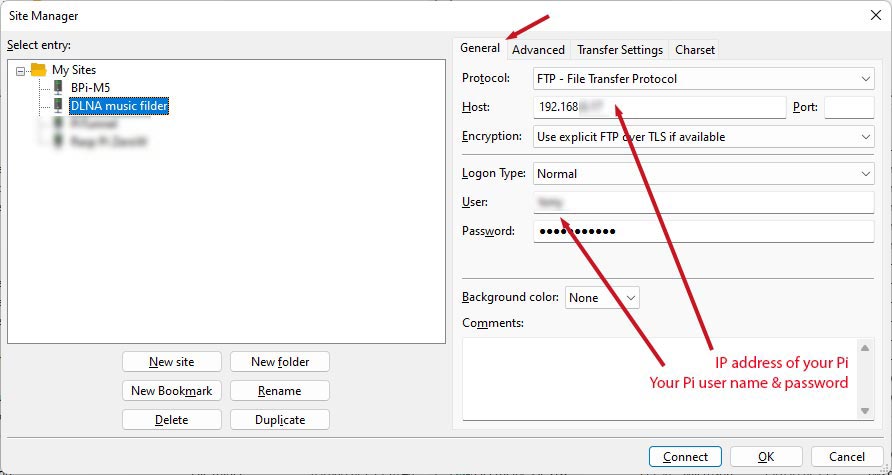
General tab: enter the IP address of your BPi-M5 and your username/password to log into your BPi-M5
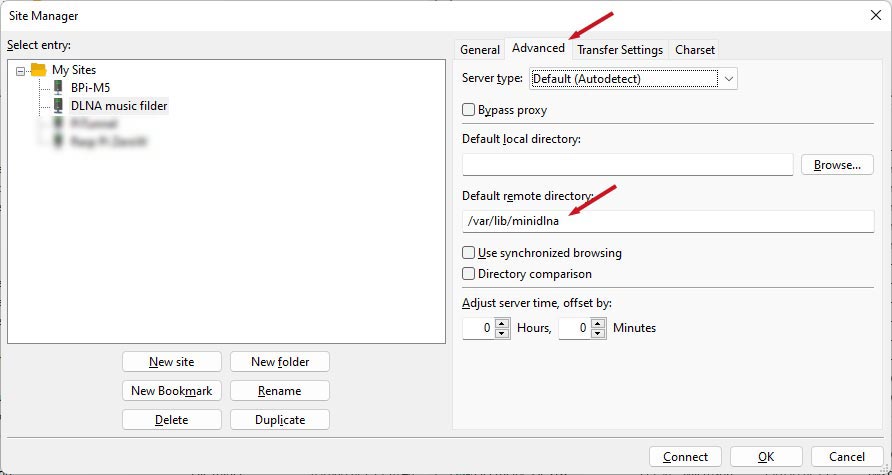
Advanced tab: enter /var/lib/minidlna in the 'Default remote directory' box
2) Samba share
In exactly the same way you installed SAMBA (here), open the config file and add a second SHARE DEFINITION, right underneath the first one.
Scroll down to section SHARE DEFINITIONS and add the following at the top of this section.... I named my share "BPi-M5 Music"
[BPi-M5 Music]
comment = your user name Home
path = /var/lib/minidlna
browseable = Yes
writeable = Yes
only guest = yes
create mask = 0777
directory mask = 0777
public = Yes
force user = your user name
- Keep the square brackets in the 1st line & make a note of this name. It is the name you are giving to the 'SHARE' and you will need this name when to connect from a Windows machine
- Replace your user name with your name.
- Add a Windows share in the same way as on the SAMBA page